Building a DIY cooler using two TEC1-12706 Modules

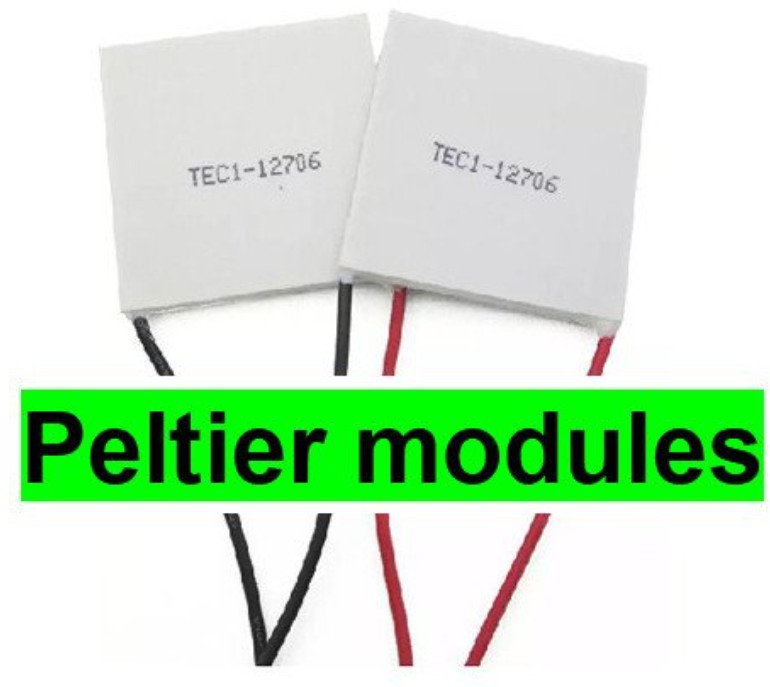
The two TEC1-12706 Peltier Modules
Wouldn’t it be nice sometimes to grab a cool beverage without the need of visiting your fridge? In this note, I will investigate how to achieve this luxury by building a self-made cooler or fridge which can be powered by a car battery. If you are into camping, it offers space for two half-liter cans and decreases the temperature just below 8 degrees.
The main component of these builds is the so-called Peltier modules. But before going into detail about those, let’s firstly talk about thermocouples. Those consist of two different metals, which are connected in one point to create a variable voltage in relation to the temperature difference between the connection point and a reference point. This is called The Seebeck effect. Which is a phenomenon in which a temperature difference between two dissimilar electrical conductors or semiconductors produces a voltage difference between the two substances? The Seebeck effect is used to measure various temperatures. But this also works in the reverse direction. As an experiment, we can use a thermal paste to bind the side without the text of the Peltier module to a small heatsink and the other side to an aluminum sheet. If we now apply a small voltage, we can see that current is flowing and the aluminum side gets cold and the heatsink site gets hotter. This is the so-called Peltier effect, but in comparison to thermocouples, we use quite a bit more couples, which this time consists of semiconductors. The datasheet of the Peltier module gives us a bit more information about the module itself. This one uses 127 couples and can handle a maximum current of 6 Amps. As I was playing around with it at a voltage of 5 Volts, I realized that the heatsink on the hot side was certainly too small because it reached a temperature of around 55 degrees. The cold sides started with 19 degrees but slowly rose up to 23 degrees since the module can only achieve a certain temperature difference – meaning that, if I would use an active cooling on the hot side, the temperature of the heatsink is lower and I can achieve lower temperature on the cold side as well. But 14 degrees is still too warm for any drink.
The solution was pretty simple. I just got myself an overview of what heatsinks I had available to play around with and chose two old CPU heatsinks. With them, I reached the maximum low temperature of around 7 degrees for the AMD heatsink and even around 5 degrees for the other one which was decent enough.
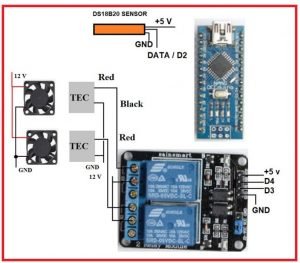
To save a bit of power, I used a 2-position controller. This means that I will use Arduino Nano and a DS18B20 temperature sensor to measure the temperature constantly. Once it reached a defined low level like for example, 6 degrees, it turns off the Peltier module with a relay.

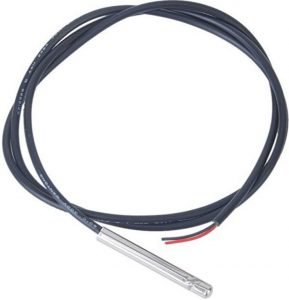
DS18B20 temperature sensor
Once the modules are turned off, the temperature increases only slowly due to a hopefully well done thermal insulation. After reaching another defined level, like for example, 8 degrees, the modules turn back on again and cool down everything inside the box. This cycle then repeats and will save a bit of power. I created the simple Arduino codes and did the first test try. I measured the dimensions of my two cans and came up with a three-layer design that uses an inner and outer layer of six millimeter MDF and the middle layer of 30 mm Styrofoam.


2 Channel DC 5V Relay Module

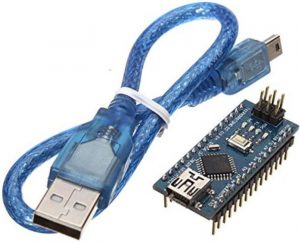
Arduino Nano Board ATMEGA328P Module

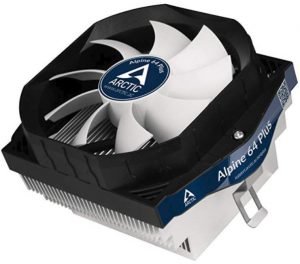
CPU Cooler for Quietness 80mm PWM Fan


8 Comments
Thankfulness to my father who shared this with me about this webpage, this weblog is truly awesome.
Your mode of telling the whole thing in this piece of writing
is in fact nice, every one can easily be aware of it, Thanks a lot.
Hi, I do think this is a great blog. I stumbledupon it 😉
I will return yet again since I book marked it. Money and
freedom is the best way to change, may you be rich and continue to help others.
I am regular visitor, how are you everybody?
This piece of writing posted at this web site is actually
nice.
Wow! In the end I got a website from where I can genuinely obtain useful facts concerning my study and
knowledge.
Hello very nice site!! Guy .. Excellent .. Amazing .. I’ll bookmark
your site and take the feeds additionally? I’m satisfied to search out a lot
of helpful info right here within the post, we’d like develop extra strategies on this regard, thanks for sharing.
. . . . .
Pretty component of content. I just stumbled upon your blog and am in accession capital to say that I acquire in fact enjoyed account your blog posts.
Anyway I’ll be subscribing for your augment and even if I fulfill you get entry to
constantly rapidly.
I really like what you guys tend to be up too.
Such clever work and exposure! Keep up the good works guys
I’ve included you guys to my own blogroll.
Comments are closed.